I've chosen to build my own speakers for my theater, for several reasons.
- I feel I can get high audiophile quality sound from a good design, properly executed.
- The cost will be less than buying high-end speakers ready made.
- Pride in having built them myself.
- I've got a really cool woodshop I need to justify.
- I figure I'll learn a few things about speaker building and design along the way.
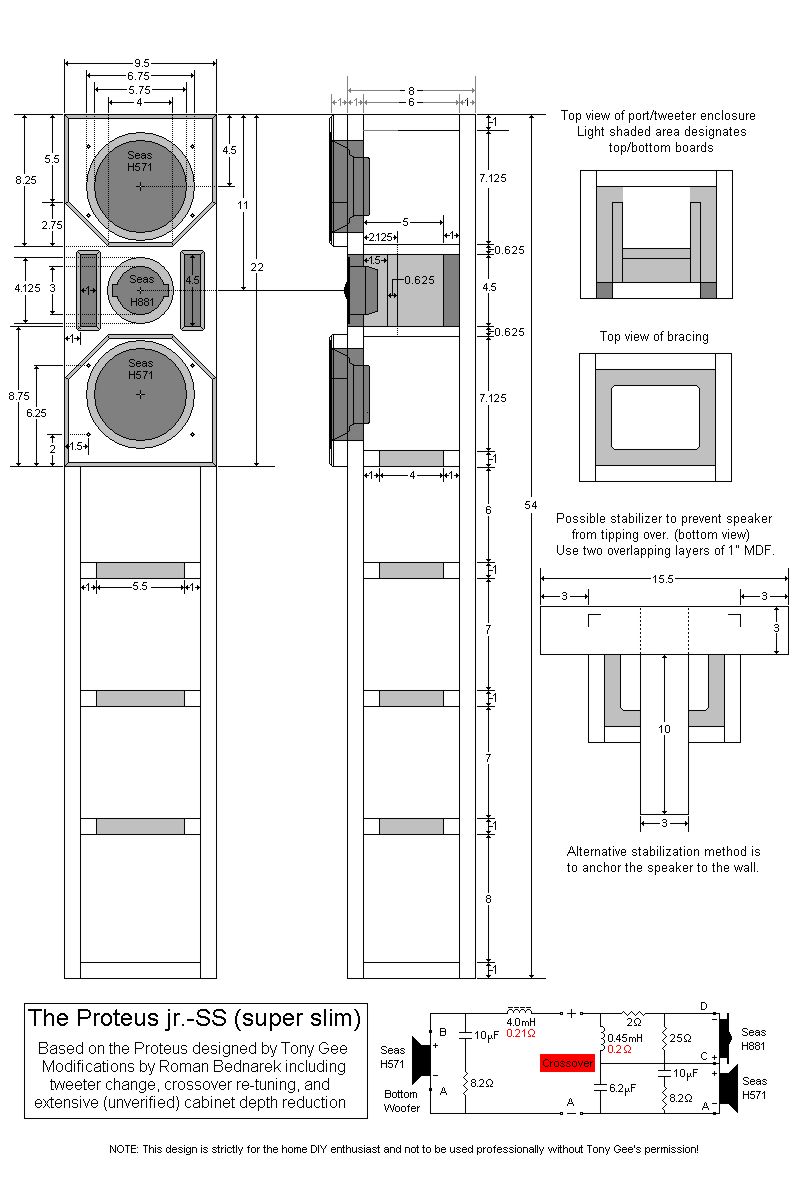
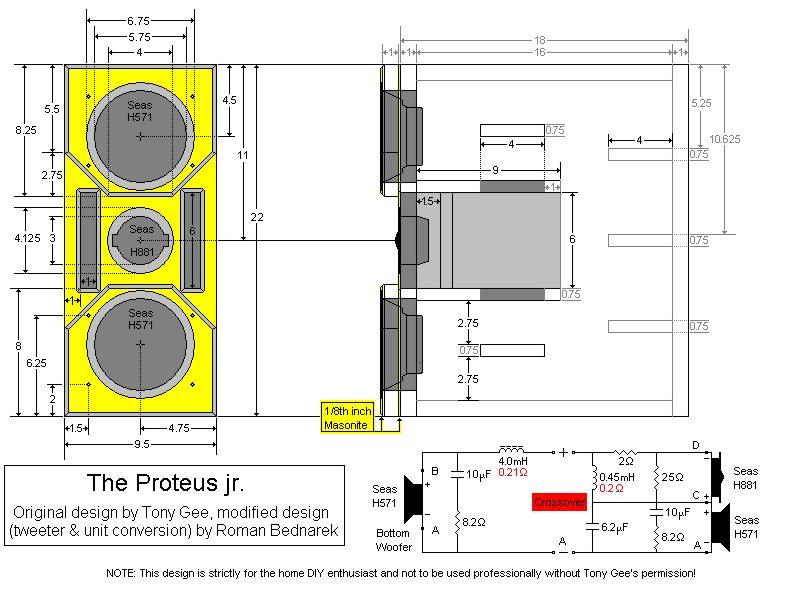
The design I've chosen is the "Proteus", this is not my design, but that of Tony Gee, a master speaker designer and builder. Tony and I seem to have a lot of similar ideas about audio and acoustics, namely you can never build something too dense or too stiff.
Much credit also goes to Roman Bednarek, who is also a big Proteus fan. Roman has graciously shared his design info, drawings, and material lists with me. He has also helped me modify the design to fit in my columns for the surround channels.
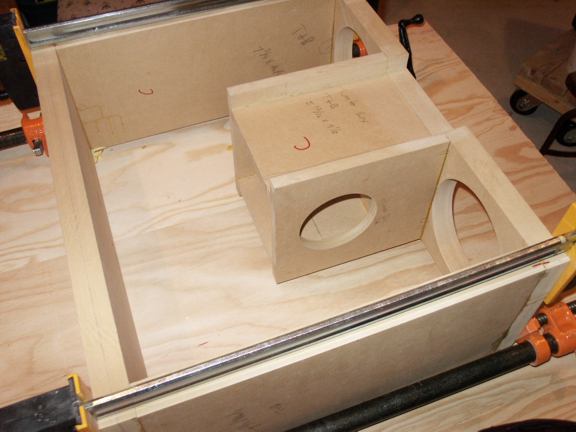
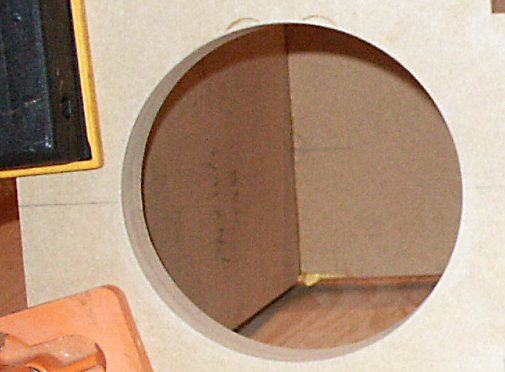
Close up of cut out for woofer. I'm very pleased with how smooth they came out using a router with a custom jig.
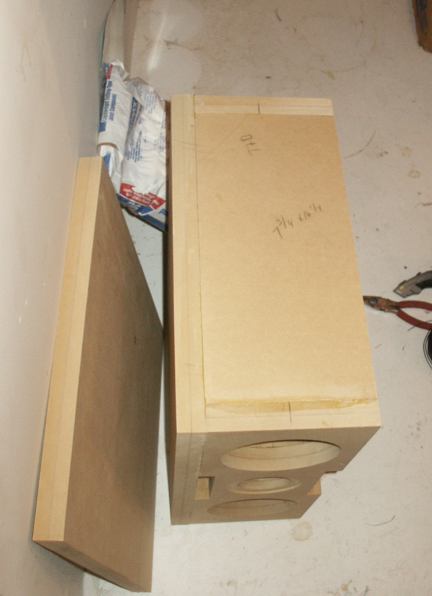
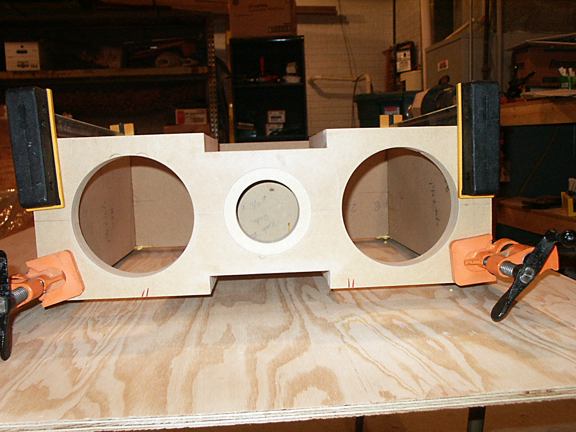
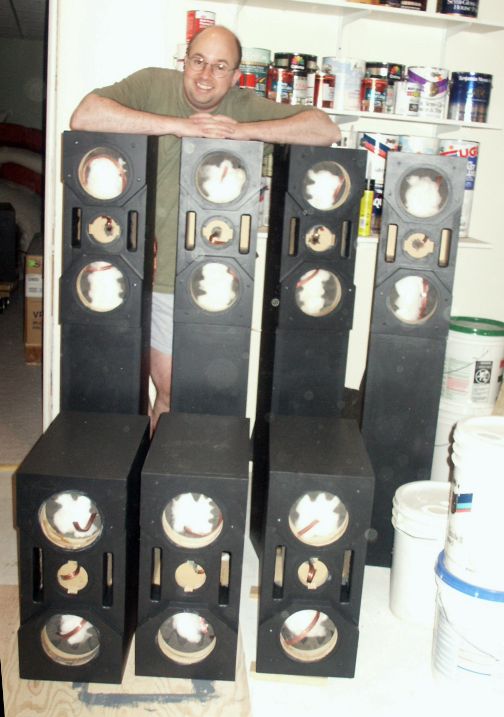
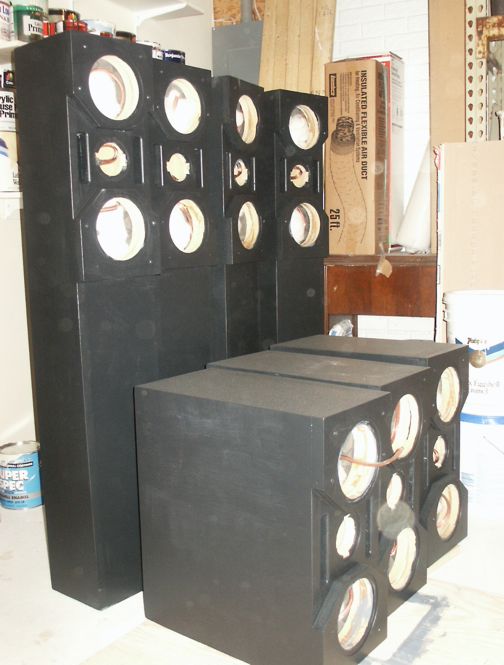
Front on view of the completed cabinets. Just driver installation and crossover construction to go. Almost there....
The theater has become my speaker factory. Not only do tightly constructed rooms control sound, but they help control dust too!
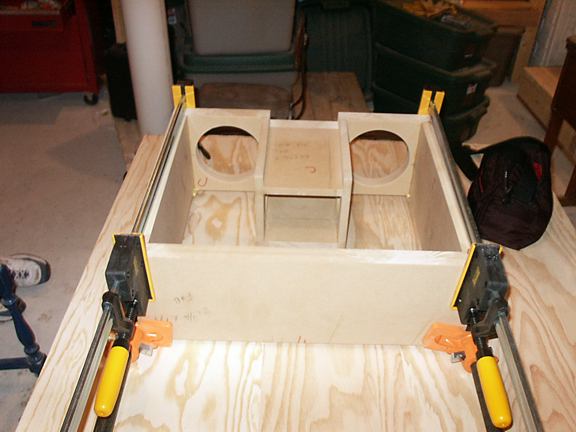
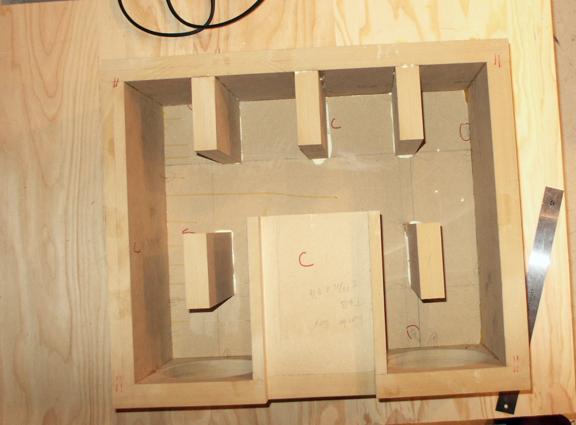
View of the speaker from the side with the bracing in place. Cabinet resonance is going to be a non-issue.
The completed cabinets, completely assembled, primed and painted.
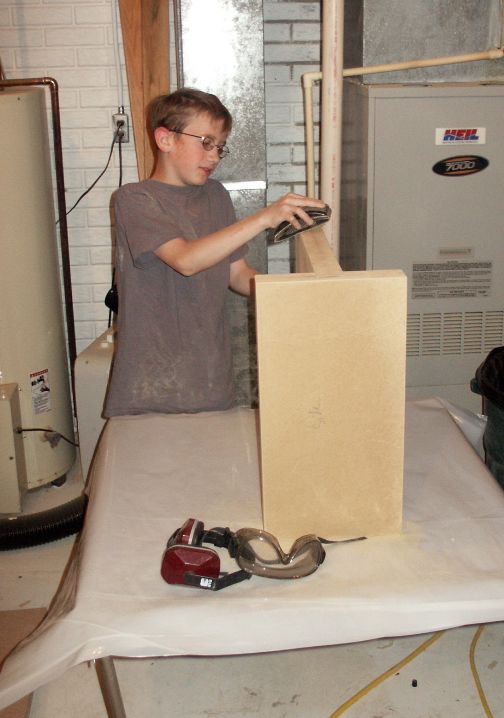
James sanding a speaker stand for either the left or right channel. A real family project.
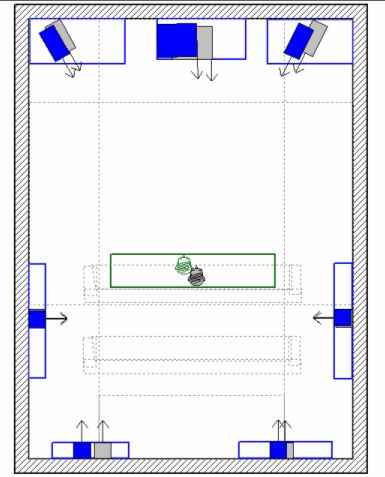
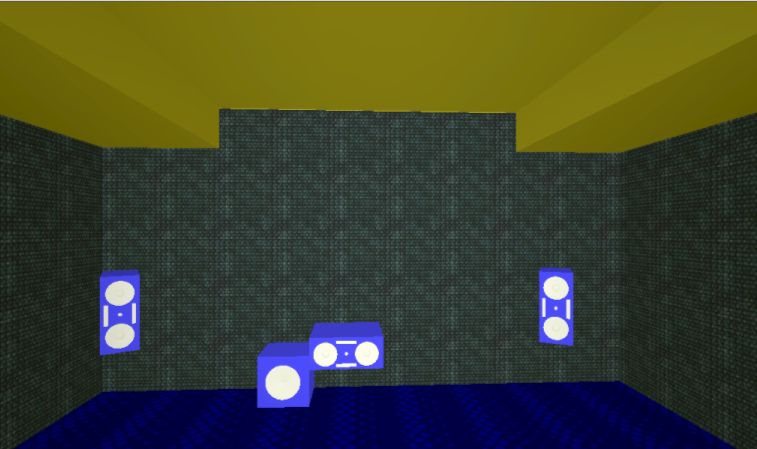
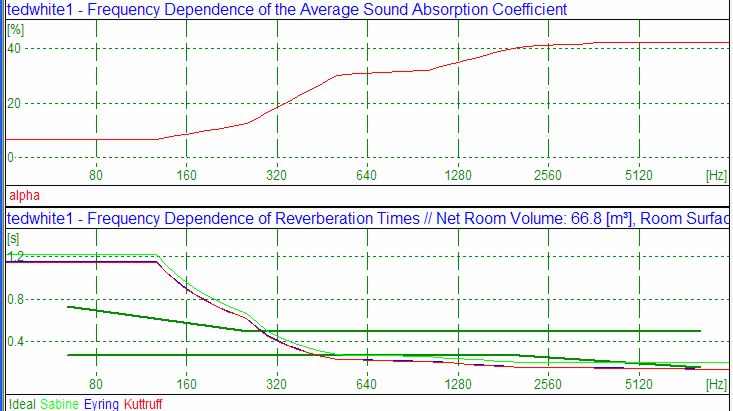
I had Chris from CCE model my room and use the model to predict the best speaker placement based on the limits of the room construction. He was also able to predict the final RT60 and room effects on frequency response. He was also able to provide an "auralization" of the room so that I could hear how the room would affect music and soundtrack playback.
When the room is finished we'll compare the actual response with these predictions.
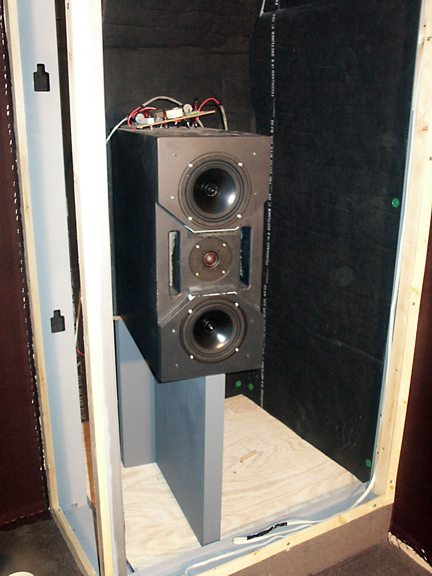
The drivers are installed, crossovers complete and speaker in place in the theater! They sound sweet!!!
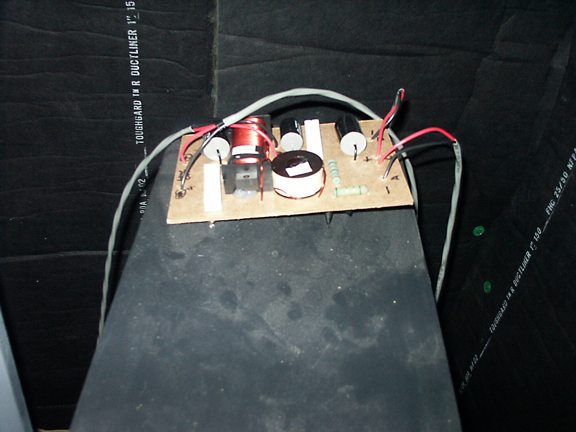
Top of completed speaker showing outboard crossover network.